Inserting Images

* Note: Please resize your images in Adobe Photoshop to the size you need BEFORE uploading images into the CMS. Images should be sized no larger than 960 pixels wide. If you want an image to be half the width of the webpage, your image should be 480 pixels wide, etc. Please see the tutorial regarding adding/overwriting images to the CMS once your image(s) have been properly sized. If you do not have Adobe Photoshop, please e-mail servicedesk@winthrop.edu to have Adobe Creative Cloud installed.

  1. Place your cursor in the area that you would like to insert the image on the page and click on the picture icon in the 2nd row of the toolbar.  If you are left or right aligning an image, you will place your cursor in front of the first letter of the first word of the paragraph that you want to place the image beside (text will flow around the image).

    Step 1

  2. Click the Source icon (up arrow) to the right of the Source field.

    Step 2

  3. Make sure that the drop down on the right is set for "Staging" and click "www" to get to the root level of the site.
  4. Scroll down and click on "uploadedImages" then, scroll down and click on your folder name.
  5. Scroll down until you see the name of the image that you want to appear on the page and click the file name.

    Step 3

  6. Click the blue "Insert" button.
  7. Make sure and add an "Alternative description" and an "Image title" text in their respective fields.

    Step 4

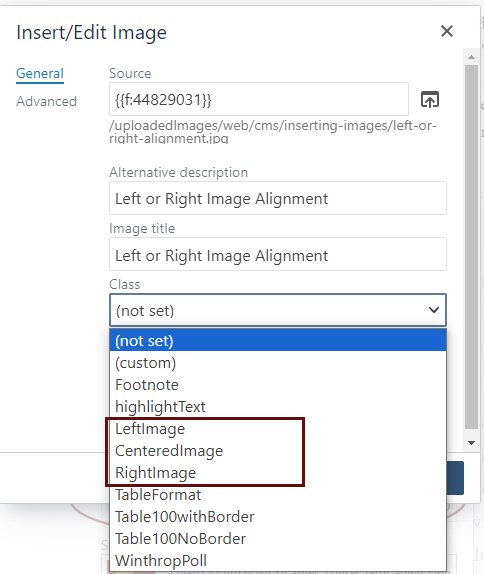
  8. To center, left-align, or right-align an image, choose the appropriate class from the "Class" dropdown menu

    Left or Right Image Alignment

  9. Click the blue "Save" button and your image will appear where you originally placed your cursor.
  10. Remember to either "Save and Exit" if you want to make more edits later (the page will not be live) OR, simply click the green "Publish" button to make your changes live on the site.